Showing posts with label Bargain. Show all posts

Tuesday, 2 February 2016

Fashion - Thrift Shops & My Tips for Shopping in them

Hi guys!

Even before I started my blog, I was always on the hunt for a bargain when it comes to shopping. One of the best places to find a bargain when it comes to clothes, shoes and books is thrift (or charity) shops. I know people may have negative opinions about shopping in thrift shops, but there's really nothing to be negative about when it comes to them. I've actually got some of the nicest dresses, skirts and tops from them over the years for very inexpensive prices, so I'd really encourage you to check out your local ones. Not only are you getting a bargain but you're supporting the charity too - guilt free shopping, yay!

I understand though that there's people that just don't know where to begin when it comes to shopping in them, and that's where Shelly Says So comes in with my advice on shopping in them. Some of these tips can also be applied to shopping in general. You're welcome! xo.


Tip No.1: Be patient!
As a rule, charity shops are as organised as can be but they're quite a different experience from shopping in Penneys (Primark for all my lovely British friends!) or New Look. In Penneys you walk in and you see a pretty dress. That pretty dress is all in different sizes, all on the same rail. However, it's quite a different story in  charity shops (with the exception being the British Heart Foundation here in Carlisle, everything is so organised). You see a pretty dress, but it's not in your size and on the same rail there could be up to thirty different dresses. It leads to expected frustration, so you must be patient. Rummage through rails like your life depends on it because you never know, the dress of your dreams could be stuck behind a load of other boring dresses....


Tip No.2: Know when something is a bargain or just shite! 
From personal experience even from shopping in the likes of Penneys, I know how easy it is to get swept up in the moment just because a product is a low price. Charity shop clothes are of good quality, there is no way anything would be allowed through their doors and put on a rail if they had holes in them where there wasn't supposed to be holes or were in need of rescue. But I've lost count of how many times I've fallen in love with what a dress looks like and the low price of it and abandon everything else that's important when it comes to selecting an item of clothing. Yes, it looked nice on the rail and was as cheap as chips, but when I came home and tried it on, wanting to wear it for a night out, I found that it just wasn't the right fit and was drawing attention to the parts of my body I'm insecure about. Therefore it was a mishap on my behalf and felt like money down the drain (a fiver doesn't seem like too much but when you're a student, a fiver is loads to spend and could have been used for other things (like alcomohol haha), and the dress never did get it's night out on the town.


Tip No.3: Think practical!
This kind of ties in with my second tip above, and it's a mishap I'm equally guilty of making when it comes to thrift shopping, as well as regular shopping. Again, I fall in love with a skirt, dying to wear it out, and then realise it doesn't go with anything else in my wardrobe whatsoever. I know fashion is all about experimentation, but fashion is also like a relationship; if it's a strange fabric/material/colour it could be difficult for it to get on and work well with the rest of your clothes. Same thing applies if you have a million of the same type of clothing at home. If you already have a LBD at home that you barely wear as it is don't bring another one home with you - no matter how cheap it is - to hog further valuable space in your wardrobe.


Tip No.4: Try to not get disheartened. 
It's happened to me many times. I walk in one week to a charity shop and I come out with a bagful of bargains, the next week I go into the same one and I'm lucky if I find a book in it I want to read. It's often a matter of luck and being there at the right day and at the right time. Anyways, shopping should be fun, and shopping in charity shops is even more fun, if you let it be that way. This may be a sign I'm getting old, but I enjoy nothing more than spending an afternoon browsing through the rails, even better if I have a friend with me and we can laugh at some of the items for sale in the shop (High School musical calendar from 2005, anyone?). It's such a good feeling when you finally get a good bargain that you weren't expecting that it's well worth it.

Tip No.5: Wash the clothes!
Like I've mentioned already, charity shop clothing is at a very high standard. You'll never walk in and see clothes with vomit or any other bodily fluid on them, but they do have quite a strange smell that obviously transfers to the clothes, so I always wash the clothes after I purchase them, just to make sure all smells are off them and they smell fresh and fancy for your nights or days out.


So here are a few of my charity shop bargains!!


Flowery Dress: NCBI (National Council for the Blind Ireland), Ballina, Co. Mayo, Ireland. Cost €5.


Polka dot Dress (by AX Paris)
: Oxfam Dublin, €5.


Polka dot dress (by AX Paris):
 Oxfam in Dublin, €5.


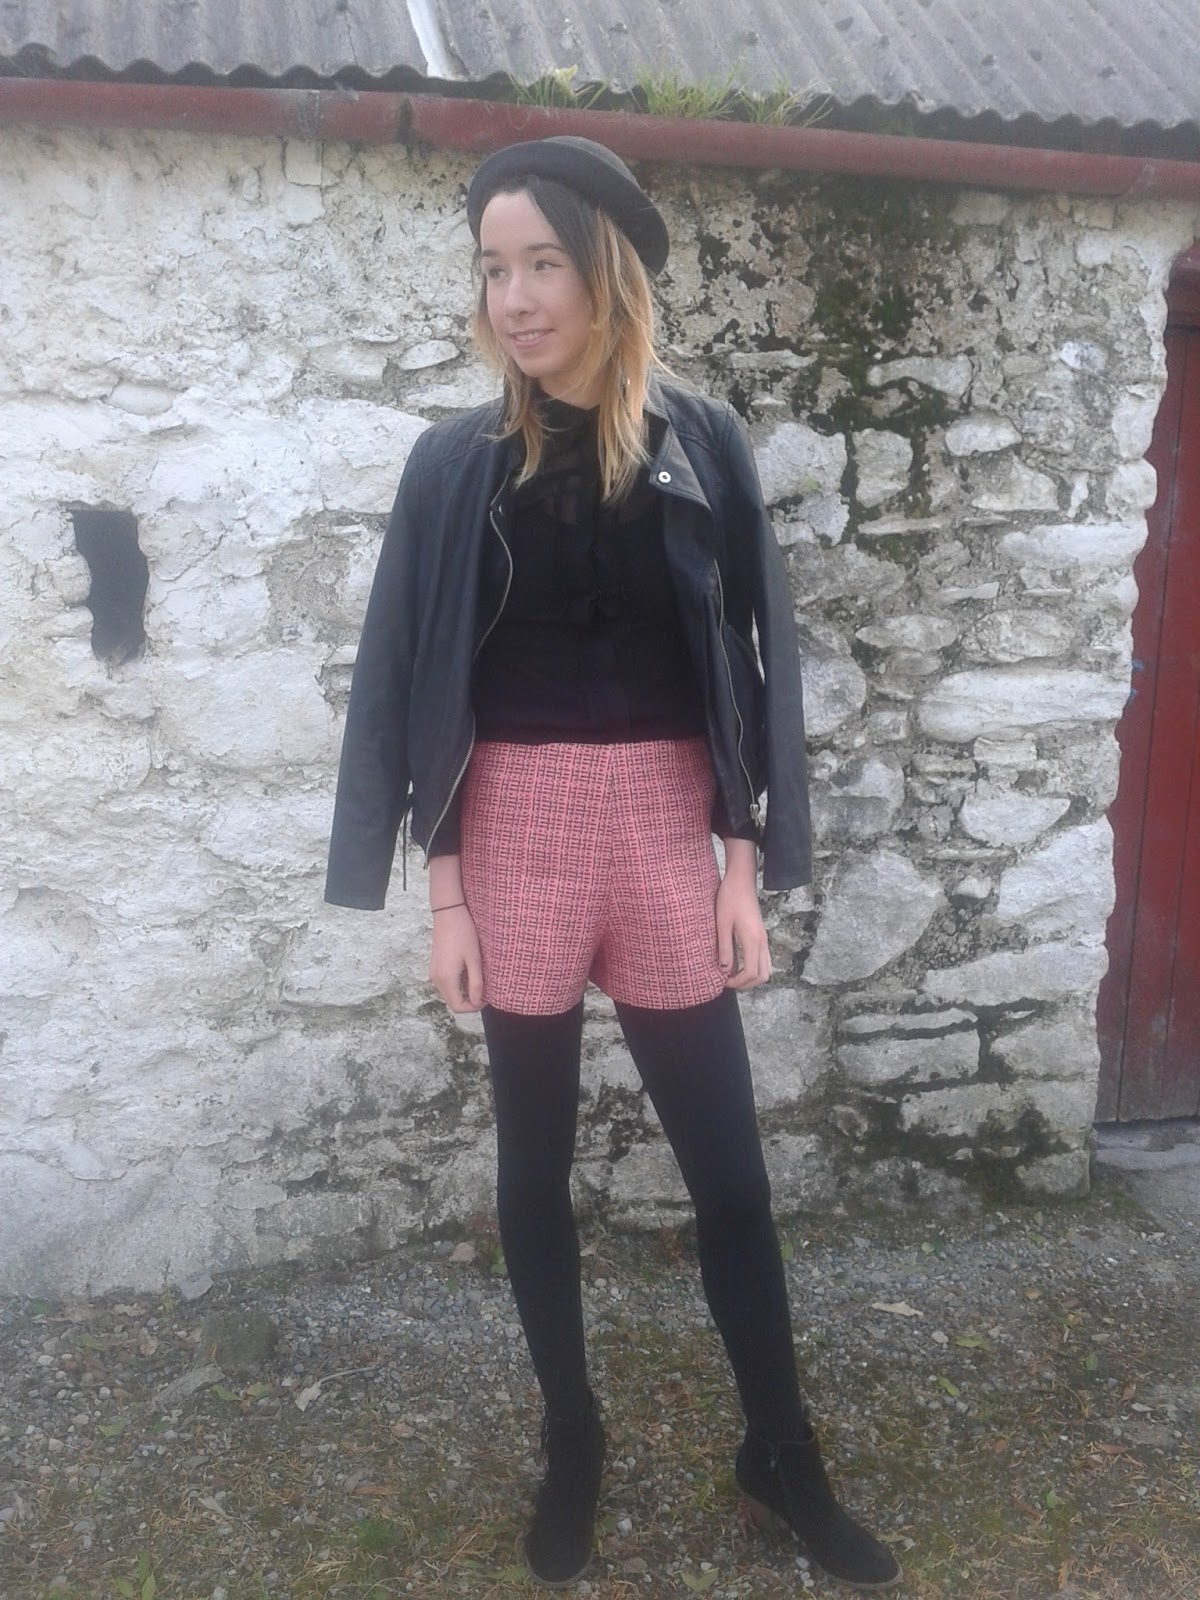
Shorts: 50c (NCBI, Ballina, Co. Mayo, Ireland).


Wednesday, 27 January 2016

Coconut Oil: Benefits for Hair and Beauty

Hi everyone!

These days people are more aware of what products they are putting on their bodies. A lot of cosmetics have been linked to breast cancer among others, so many people are switching to organic, natural products. As a result, coconut oil has come to the fore front and has become the holy grail in this natural lifestyle, though it is not a new phenomenon at all, having been used in the US well before World War II.


There are literally hundreds apon hundreds of uses for coconut oil, to everything from cooking to adding in yoghurt and smoothies to putting on your dog! I personally prefer not to use it in food as I'm not sure would the taste be that great and also it is high in saturated fat, increasing your risk of heart disease, so this blogpost will just focus on its hair and beauty uses. As you might also expect, there are hundreds of hair and beauty uses too for this little gem! I'm obviously not going to talk about all of them as I don't want to bore you to death, and I didn't want to talk about things I haven't personally tried out myself.  I felt it wouldn't have been right to you guys, my readers, if I just paraphrased people's other work off the internet, saying it did this that and the other, you to try it out and it doing the opposite of what I was claiming it to do! My aim in writing this blog has and always will be about being really honest in what I did, so you'll know for sure about the product you're buying, the good and the bad bits. I got this big jar containing 500ml of coconut oil in my place of work, Home Bargains for £3.99 (about five euro), but I've seen it in Tesco and Holland and Barrett too.


Body Oil
My main reason for trying out this product was because of its moisturising properties I have heard so much about. I have mild to moderate eczema (a skin condition meaning my skin becomes itchy, red, dry and cracked, which fluctuates, hence why I have referred to it as mild to moderate, due to a number of factors, such as stress, detergents), plus sensitive skin, and contrary to what you might imagine, I have a difficult time finding moisturising products that suit! Many which tie the both together and soothe my skin are either ridiculously expensive or smell horrible! Simple is a good brand I have been using for years, but sometimes I want something that's slightly scented (being the girl I am).  Coconut oil is a natural product, inexpensive (see above) and smells like a beach holiday, meaning I'm always happy to slather it on everywhere after a shower or bath, and it doesn't irritate my eczema one bit! When I posted a photo of this on my Instagram HERE, I had a comment from one of my followers saying it helped calm down her psoriasis a lot, so if any of my readers have that, coconut oil is worth trying out!

Makeup Remover
Even the most waterproof mascara doesn't stand a chance against this guy! Apply some directly to your face to act as an oil cleanser or let it sit with a cotton pad, and voila! Your makeup will melt away. As it's a natural product, it suits even the most sensitive of skins. Garnier micellar water, you  have some stiff competition!

Lip Balm
In this winter weather, chapped lips are a common problem, which ain't great when you wear as many lipsticks as I do. I always used to use Vaseline as a lip balm, but I haven't used it in a while as I have read many articles claiming it to be linked to cancer. Coconut oil is a much more natural alternative, especially as it is semi-solid in room temperature. It makes lips super super soft - perfect coming up to Valentines' Day!

Under Eye cream
The skin under your eyes is delicate and thin, making it prone to fine lines, puffiness and wrinkles. Eye creams can be expensive (many retailing at £20 plus!), so save your pennies and invest in some coconut oil instead for a fraction of the cost. It's light enough for even the most delicate of under eye skin. Just rub a tiny amount between your fingers to warm it up before gently patting it underneath your eyes.

Frizz Tamer
I have naturally very curly hair so means whenever I try to straighten it in an attempt to look polished it ends up looking frizzy, ugh. The fact that my hair is dyed bleach blonde at the ends doesn't really do anything for the cause, to be fair! I've tried a lot of smoothing serums, from Tony and Guy to L'Oreál in the past, but this works just as well (and again, is a lot cheaper). Rub a pea-sized amount of coconut oil (any more and it will make your hair appear greasy), between your fingers to warm it up, then apply it to the bottom couple of inches of hair for all day frizz protection. If you're blessed with thicker, coarser hair, apply the oil in the same way but from mid-shaft to end for frizz control. The bonus with this is that it also leaves hair extra shiny and soft, plus smelling fabulous!

Shaving Cream
Whoever said shaving cream has to lather? Use this oil as a base to get a closer shave and a positive of this is that it results in smooth legs instead of legs that are dried out. Believe it or not, this actually works! It's less messy than using shaving foam, too. I didn't use it to shave my underarms as I feared it may be a little harsh on that sensitive area, but following shaving I did put a little under my arms to soothe it. I then lathered loads over my legs following shaving to lock in the moisture.

Dandruff Treatment
Dandruff and dry scalp often go hand in hand. Moisture is needed at the roots, which comes in the shape of this baby! Apply each night lightly to the roots, and massage in, which will also stimulate hair growth (bonus).
 

Leave in hair conditioner
Following shampooing, apply a tiny amount throughout your hair (breathe in that fabulous smell!). Then wrap your hair in a towel and allow it to dry naturally. I can really see the difference in my hair after using this. It smells better, feels better and created beautiful natural curls on myself. Love it!

Hand cream
Like many products mentioned, hand cream is another product that can be expensive. This multi-tasker helps here too! Apply some coconut oil to your hands and let it absorb (you can pop on some gloves to speed up the absorption process, but you don't have to). Result: silky soft hands. Yay!

Cuticles
I am in the process of growing my nails (so very determined to stop biting them for good now, but with placement just around the corner, we'll see how long that lasts!).  I had many torn cuticles caused by biting my nails and they were rather unsightly. I applied some coconut oil and it has greatly reduced their appearance. My nails look in better shape (well as good as a shape as can be expected!).

Some need to knows:

  • As it's an oil,  it does take it's time to dry, and so therefore can be slightly messy to work with. So wait a while before dressing yourself or covering a certain part of your body. When I applied it I wore shorts and a light vest top.
  • Coconut oil has a shelf life of 2 years, so don't worry about having to use it up really quickly. Just as well, I would struggle to use that big jar up in a short length of time!
  • You can store coconut oil in the fridge or at room temperature, the choice is completely up to you. It may be slightly more soothing on skin to have it slightly chilled; either way it melts in your hand straight away so it doesn't make too much of a difference.

Friday, 15 January 2016

Beauty - Make Up Gallery Review

Hi everyone, and welcome back to my blog!

I was in Poundland a few weeks ago and spotted that they had a range of make up there - Make Up Gallery. Everything was just a pound each (obviously!) so I decided to pick a few things out (sure it was hardly going to put me in debt!), and in the end I picked out four things: pressed powder, blusher, liquid foundation and colour moisture lipstick. For my Irish readers, these are avaliable in Dealz for €1.49 each.

Long Lasting Foundation
This is a liquid foundation that claims to be "natural long lasting". It contains UVA filters which is basically a thin film on the skin which protects it from sun damage (although it's unlikely it'll fufil it's role in the UK until another few months!) and also contains the antioxidant Vitamin E, which plays a role in anti-aging.
I picked up this foundation in the lightest shade - Ivory 1. I tried it out the morning before I headed to work after priming, and then added eyeliner, mascara, all the other bits. It seemed OK at first and I was quite happy. Then I went to the bathroom to get some tissue and caught a glimpse of myself in the mirror. As  my bathroom had much better light, the foundation appeared super orange. Like Oompa Loompa orange! I couldn't go anywhere obviously looking like that, so had to scrub it all off (including my liquid eyeliner - girls, if you know the struggle you will know how pissed off I was about that!), and applied a more paler fit-to-skintone foundation. Therefore, I've no idea of how this foundation is for wear!

Pressed Powder
As the powder in this range is Translucent, I had no concerns about trying it out. Again, this product contains Vitamin E. It does have a rather strongly perfumed scent to it. Personally I didn't mind it but I know many others will. I was really impressed with this powder, though. I applied it all over, and it helped my makeup stay matte and oil-free all day long, working as well if not better than other high end brands I've tried in the past. Really good buy!


Blusher
This light pink blusher - 'Soft Blush 1' is in a teeny tiny container and like the other products, also contains Vitamin E. It doesn't have a strong scent like the powder. It's not very pigmented, but it does give a very subtle, in-from-the-cold effect, and lasts well.  Another good 'un!


Colour Moisture Lipstick
The lighting in Poundland at the time must have been off  - or else I'm going blind - but when I picked up this lipstick I thought it was black and was slightly excited as I have been meaning to try out a black lippy for quite some time. With a name like 'Black Cherry' you wouldn't blame me for thinking that! However, when I tried it out for a night out over Christmas, I found out that it's really more like a dark berry. I wanted to try it out for the night but I quickly found it doesn't have a great pigment at all - the first coat looks purple, the next application looked just slightly more pigmented. And as it was New Year's Eve, I really didn't want to be stuck in the bathroom re-applying it after every drink, so decided to stick with my Rimmel Lasting Finish lippy.


Friday, 25 December 2015

Fashion and Beauty - Christmas Day!

So after the visit to Mass, the unwrapping of presents from Santy, and falling into a food coma after the dinner, I took some time out and decided to write up a blogpost about what I was wearing today for the special occasion. I like to lay round in my trackie and hoodie as much as any other girl, but Christmas only comes round once a year so I like to make some effort for the day.


The tunic dress I'm wearing is from Penneys (Primark) and cost €14 (£10.33). I bought it Sunday afternoon after arriving in Ireland for Christmas. I really like the berry shade of it; this colour is always associated with the festive season so I felt like it was perfect! It actually has sheer sleeves, but to keep nice and toasty during the winter day I popped a long sleeved black top underneath it.
These long sleeved black tops are basic, and they're an essential part of my winter wardrobe, and only cheap as chips too, so I'd definitely recommend to invest.

The black tights were basic ones from Penneys, also bought on Sunday. I got three pairs for €6.

The scarf was also Penneys, it belongs to my sister though so I don't know the price, sorry! I'd imagine it would cost no more than a tenner. Many of my scarves are summery and light, and this is a nice thick one, so perfect for winter.

The boots are Shoe Zone, they have a slight heel on them. I bought them the first weekend I arrived in England as a birthday present to myself (I'm awful good to myself!). They were £20.

The coat is Penneys, but I bought it two years ago so I cannot for the life of me remember the price of it! I really like it as it comes out slightly at the hips and is super warm too!

Before applying makeup, I moisturised my face and neck using my trusty Simple Kind to Skin Light Hydrating Moisturiser and waited a few moments for it to absorb. My skin is super duper dry at the moment, so I applied it in a thin layer three times. FYI, I've done a blogpost on caring for dry skin, which you can check out HERE.

Foundation I used was L'Oréal True Match foundation in Ivory (the lightest shade in the range). I decided to try out this foundation about two weeks ago as I have heard it being hailed as the 'holy grail' of foundations. I'm not going to say too much  about it here as I am planning on doing a seperate blogpost all about it in the coming weeks. The concealer I used was Rimmel Wake Me Up (review of that product is HERE) under my eyes and on blemishes, before setting it with Rimmel Stay Matte translucent powder.

For eyes, I decided to use a combination of gold and brown eyeshadows to complement the berry in my dress. I used the eyeshadows in the Make Up Revolution Flawless palette. I bought this palette, containing 32 eyeshadows, in Superdrug last month. Correct me if I'm wrong, but sadly, I don't think Make Up Revolution is avaliable in Ireland. I applied 'Medal' all over my lid and up to my browbone. I then applied 'Copper Shimmer' in the crease. Then I applied a small amount of 'Molton Chocolate' where my eyeliner 'flick' would go from. Then I applied 'Gold Digger' at the inner eye. I then used Essence Liquid Ink Liquid eyeliner on the inner eyelid and flicked out to create winged eyeliner effect. I applied a tiny amount of Rimmel Soft Kohl Kajal Pencil on my waterline, going about half way across. I find that on my small hooded eyes, black kohl eyeliner makes them appear even smaller, so it's used sparingly with me!


The blusher I used was Make Up Gallery Blusher in 'Soft Blush 1'. Make Up Gallery is actually a range of makeup from Poundland, would you believe! In Ireland this range is avaliable in Dealz. I've been trying out this guy plus a few other products for the past few weeks so that is another post I am looking forward to showing you all. I filled in my eyebrows using Primark eyebrow kit.

I was trying to find a lipstick to suit my eye makeup and dress, and I felt red didn't match either of them, so I stole my mum's Essence lipstick in the shade '04 On the Catwalk'. Mum loves this lipstick and after wearing it for the whole day today, I can see why! I've never used any of Essence lipsticks before but I may have to invest after today! This and the liquid eyeliner I mentioned above are widely avaliable in Ireland, from Penneys to several pharmacies, but the only place where Essence is avaliable in the UK is Wilko.


                                                             Product List and Prices:

Simple Kind to Skin Light Hydrating Moisturiser, €5/£3.70.
L'Oréal True Match Foundation in 'Ivory', £9.99/€13.55.
Rimmel Wake Me Up Concealer in '040 Soft Beige', £5.49/€6.99.
Rimmel Stay Matte Powder in '001 Transparent', £3.99/€5.99.
Make Up Gallery Feeling Blush Blusher in 'Soft Blush 1', £1/€1.49.
Make Up Revolution Ultra Eyeshadow Palette in 'Flawless', £8.
Rimmel Soft Kohl Kajal Eye Liner Pencil in '061 Jet Black', £2.99.
Essence Liquid Ink Liquid Eyeliner in 'Black', €2.49.
Essence Lipstick in '04 On The Catwalk' (think its around €3/£2).
Primark Eyebrow Kit, £1/€2.


Hope you enjoyed this post! Any questions, don't be shy! xx

Tuesday, 3 November 2015

Beauty - Superdrug Haul featuring Collection, Make Up Academy, Make Up Revolution & Beauty UK

Hi everyone!

I popped into Superdrug a few weeks ago and got a few make up related things there. As I'm primarily a budget blogger, I decided to try out some of the budget brands that were there. Some of these brands I'll mention Irish readers may not know about, I'm not sure are they available in Ireland as well as in the UK.

Collection Lasting Perfection 16 Hour Ultimate Wear Foundation
I couldn't bring liquids on the plane over here so that unfortunately meant that my Rimmel Match Perfection foundation I'd usually wear for day time (see review of that product HERE), was left behind in my bedroom in Ireland (sob!). So obviously the most essential piece of makeup I needed to buy was a new foundation. (the other make up I bought that I'm going to discuss in this blogpost was purely me being distracted quite easily in Superdrug!). I decided to try out the brand Collection as I had never used it before and I'm always open to trying out new brands. Collection is a British produced brand but is available in Boots in Ireland as well as here in the UK (though for some reason I had never tried any of the brand out while in Ireland). This foundation claims to last for 16 hours, provide 'flawless coverage' and 'minimize imperfections'. The packaging says it contains SPF 20 which is always good to have (even in British rainy weather!) and claims to be oil free also. I tried this out the next day after I bought it. To test the lasting power of it, I tried it out with very little setting powder. My skin is usually not very oily, but after just a few hours of wearing this foundation I saw that it had become particulary oily. I have tried to use it with quite a bit of powder but I just don't like applying too much powder - I think it looks a bit cakey - but with this foundation I felt like I had to.
Another thing I really disliked about this product was the shading. Even though Ivory is the perfect shade for me throughout pretty much every make-up range, this foundation in Ivory looked more than a little orange on my face. I try not to buy the lightest shade in any foundation, because it tends to make me look drained and washed out more than I look at the minute, but with this one really had to because I was walking around uni looking like one of the Oompa Loompas from Charlie and the Chocolate Factory! Even so whilst wearing the Porcelain shade, it still ended up slightly orange on my face, which means I can no longer use the two foundations I shelled out over £13 for altogether - ugh! I don't know is this related to stress or what I'm eating, but I did notice while I was wearing this that I kept breaking out in new blemishes every single day!
I am keen to try out the Collection Lasting Perfection concealer  though - it's nearly always out of stock here and it's meant to amazing, so when that comes back into stock I'll have to buy it and chat a bit about it! But as for this foundation - it's a definite no no for me!

Collection Fast Stroke Liquid Eyeliner

I couldn't find my usual liquid eyeliner - Essence Liquid Eyeliner - when I first moved to the UK due to the amount of bags and clothes I was trying to sort out, so I bought this one, which is also by the Collection brand I've mentioned above. This eyeliner is a bit of a strange one. It does have quite a sharp point to allow for better definition and precision which is great if you're desiring a really defined cat eye liner effect, but I just found that when I was applying it, it was a bit too sharp and slightly sore on my sensitive eyelid. I'd much prefer a brush tip like with the Essence one (which I eventually did find by the way!) that is softer which doesn't irritate the delicate eyelid skin as much. Once on though, the lasting time for this eyeliner is average really - it doesn't last too well with watering eyes and smudges before the day is out. It set me back £2.99.


Make Up Academy Mega Volume Mascara

Make Up Academy is a mega affordable brand here but unfortunately for my lovely Irish readers this budget makeup brand is only available in the UK (soz!). The makeup stand in Superdrug caught my eye as much of their products only cost about a pound each, which is enough to make even the most hard-pressed for cash student stop and have an auld look! Because of the cheap price, the packaging is understandably very basic - all plastic and looks like it would break quite easily. However, I picked up this mascara, at just £3 I figured I hadn't much to lose. This mascara has a good brush size, with tiny bristles which ensure that every lash is coated. It wears off within a few hours, which means it won't win any beauty awards anytime soon, but is still a good day time mascara for a very subtle makeup look. I would advise to layer a few coats of mascara if you're after a noticeable effect at all, i.e. apply a coat, wait for it to dry and then add another or another if you want, depending on how dramatic you want to go, but do note that you won't get the false lash effect with this guy.


Make Up Academy Translucent Pressed Powder.

This is literally the worst ever powder I have ever tried! I applied a small amount the first day I used it to see what it was like but combined with the Collection foundation above, it made my face look like a good place to fry an egg on! I applied a bit more the next day but it just made my face look super cakey and I hate the look of cakey powder on my face and even though with a lot applied it doesn't seem to fufil it's role of setting foundation all that well! I did only pay £1 for it so really wasn't expecting much but my Primark Loose powder was €2.50 (which isn't too much more expensive when you convert it into pounds - £1.43), and that to me was a far better product.


Makeup Revolution Focus and Fix Liquid Concealer

Makeup Revolution is another budget British makeup brand that I was interested in trying out. This concealer was affordable at £2 so I said I may as well give it a go. I thought this concealer was only just all right. It's nothing too amazing, quite average really. I found that I had to add a lot of product to get it to even have any effect in covering up my dark circles (and compared to other times in my life, my dark circles at the moment aren't even that bad). As for trying to conceal spots, I felt a foundation worked much better.  Having said that though, Make up Revolution is a brand that I really want to try out more over the coming months. Their eyeshadow palettes are dupes for the Urban Decay Naked palettes, and are only £4, which truth be told was what really attracted me to the brand!

Beauty UK Lipstick

This is a budget beauty brand but as you may have guessed by the name, is only avaliable in the UK. I got it in the shade 'Passion', which is this beautiful pink shade as you can see and applies very smoothly to the lips and has a peppermint smell. It does last if you don't eat or drink anything, so you would need to constantly reapply. By the end of the day it turns to a pink liptint which I actually found to be a lot more wearable so it doesn't vanish completely. It does normally retail at £3.20, but I got it for a reduced price of a pound.


Hope you enjoyed this post! xx


As always do not hesitate to check out my social media links:


Snapchat: shellfoody92


Friday, 23 October 2015

Beauty - Review of Aussie 3 Minute Miracle Colour Deep Treatment

Hi everyone, and welcome back to my blog! I hope you had a great week, and hope you have a great weekend too. For those of you who live in Ireland, I hope you have a great bank holiday weekend! (I'm actually so jealous by the way - could do with having a good sleep in on Monday!).

I hope you also enjoyed my last blogpost - on some creative, last minute simple ideas for Halloween. I got some good feedback on the post and I'm happy you found it inspiring and hopefully you won't be lost for ideas come next weekend! If you haven't checked it out, you can HERE.

It's been a while since I did a blogpost on some hair care product, so that's what I'm going to talk about today! Aussie are obviously an Australian-produced haircare brand. They have an extensive range of deep conditioners, shampoos, conditioners, hairspray, heat defence products just to name a few, all using extracts of some native and wild Australian fruits.

I think it would be an understatement to say that I have a severe love for the brand. If you'll know their products, you'll know that they smell absolutely divine to say the least and they really do the job as well, but the only downside is that they are rather expensive, although I have used some of their full sized products before, and really like their leave in conditioners, shampoos and their conditioners. The Aussie product I constantly repurchase however is their Miracle Recharge Luscious Long Lightweight conditioning spray, and a review of that product plus an in-depth view of my hair care routine as well as how I did my dip-dye myself, is HERE.

Luckily for anyone like myself that's watching every penny they pay out, they have some of their full sized products in little 20ml sachets for a very reasonable pound or two so you can try it out and see do you like it enough to commit to buying it in a full sized container.

I brought over a small sachet of their 3 Minute Miracle Colour Deep Treatment in my suitcase from Ireland a few weeks ago. I paid €1.50 for this small sachet in a local pharmacy.


I only have my hair coloured on the ends where it's bleached with the ombre, but I don't know is it from the stress of readjusting to life in a different country, or what I'm eating or my eating pattern (which is sporadic at best), or just an unhealthy addiction to the hair straightener, but the top sections of my hair have been feeling so dry and damaged recently. There's been a lot of frizz so most mornings heading into uni I look like I have been electrocuted (which wasn't really a great look to be fair...).


So as I had put this in a drawer, I decided to use it.

This comes in a small sachet like I said and you can easily open it using your fingers without the need to cut the top off. It smells beautiful. It contains Australian wild peach, whose kernels were used by the Aborigines as a form of hair conditioning oil, and you can really get the smell of peach off it! This new formula contains aloe vera also.

So after I washed with my regular shampoo (which is Head and Shoulders Classic Clean -  nothing else seems to get rid of product build up and dandruff quite as good!), before applying this in handfuls all over my hair. The packet instructions said to only leave on 1-3 minutes, depending what condition your hair is in, but I wrapped my hair in a warm towel and left it in for a half an hour, then washed it out using lukewarm water (not too hot, not too cold). I then left my hair to airdry naturally (not my intention, but my sister and mum Skyped me then and it wasn't exactly polite to blast the hairdryer, but I'm sure my hair thanked them for their impromptu call!).

My hair wasn't still completely dry when the Skype ended, so I still needed to use the hairdryer to dry some of my hair. I couldn't get over how soft my hair felt! I straightened my hair then using my hair straightener and thought it was absolutely amazing, so soft and although it didn't take away the frizz completely, it certainty made a noticeable difference.

Would I repurchase this? Definitely!

Hope you enjoyed this post ! x 

As always do not hesitate to check out my social media links:


Snapchat: shellfoody92


Sunday, 18 October 2015

Some Scarily Creative (but simple!) Halloween Outfit and Makeup Ideas on a Budget!

Autumn is my favourite time of the year by far, and it's not just because it's my birthday! The changing fashions (love snuggling up in chunky jumpers), the changing colours of the leaves (a must for any photography buff!), and of course it's Halloween.

When I was a child I really used to love the tradition of dressing up and going around the neighbourhood trick-or-treating. Obviously, it's not that acceptable for a 23-year-old to go around trick-or-treating nowadays, but I still like to get dressed up for the occasion. As I've recently started back at college however, I've a limited budget to play around with, and I know that other students are in the same boat, so I decided to do a blogpost about some simple - but most importantly - cheap Halloween outfit and makeup ideas.

But as I'm quite a creative person, I am including Halloween outfits a bit more creative than your average witch or vampire, which to be honest can be made using a few holes in a black bin bag. Where's the fun in that?!

Some of these outfits can be worn by either men or women, you will clearly know when they are specifically for one gender or generic.

1. Regina George.
I hope there's not anyone reading this that hasn't watched Mean Girls (if you haven't, seriously shame on you gurl!), but you know the scene where Cady and Janice try a series of schemes to bring Regina George down, and one of them is to cut her top so she has boob circle cutouts. Instead of being humiliated like they expected her to be, Regina walks out of the changing room and before you know it, a tank top with boob cutouts becomes the new fashion statement. This one is so easy to do - a white tank top (they're so cheap in Penneys or New Look), and a brightly coloured bra (you probably already have that too!), will do the trick. You can wear it with a skirt or jeans, however you wish. So fetch!


2. Wednesday Adams.
This is another one for the girls that is just so easy to do! Most people have these black dresses with white collars, if you don't you probbaly have a black dress and can simply attatch a collar or wear a white shirt underneath. Add a pair of black tights and black boots and plait your hair in two plaits either side of your head, apply some pale makeup (for me anyways that's my normal foundation!), and some black eyeshadow and your'e done!


3. Ceiling Fan.
I love puns so this one had to be included in this post! Best of all, it's so simple to do. Literally all you need is a plain white T-shirt and a permanent black marker. Write "GO CEILING GO" over the T-shirt as seen in photo and add pom-poms if you have them handy. Congradulations, you are now a ceiling fan!


4.  PhotoShop
This one is another costume that is so easy to do yet is quite creative! Write "Ps" on a light blue placard and attatch holes to each top side of the card. Then put on a navy jumper and throw on the placard around your neck. Then paint some wire black and white and carry it around you for the night.
 5. Error 404 
Another really simple costume idea. Get a plain white T-shirt and write on it with permanent marker: "Error 404: Costume not found." Then you can just pair it with jeans or a skirt. Voila!


Makeup Ideas

1. Deer.
So if you're looking for a simple yet effective yet glam costume for Halloween, your safest bet is to go for some kind of animal look. Animal looks are by far the cheapest because you only really have to focus on doing some sort of makeup because more than likely you have what you need for the outfit in your wardrobe, or you can get it somewhere cheap. You also don't have to shell out loads on fancy makeup palettes either, because chances are you already have many of the items (there aren't too many) needed to recreate the animal make up looks already in your makeup bag!

So for the deer makeup, the photo below pretty much tells you what you need to do; it's fairly straightforward. Apply your primer/moisturiser and foundation to your face as normal. Now around the edges of your face (about half way down your forehead), and cheeks you'll need a darker shade than your regular foundation. You can use a darker foundation not in your shade (you know the days of when you were a teenybopper buying your first foundation and you bought it in the shade Sand Beige even though you're most definitely a Porcelain or Ivory!), or a dark contour powder, or a really dark matte bronzer; whatever you decide is completely up to you (and your finances!) and is down to what you already have in your makeup bag (there's no need to rush out and buy a foundation darker than your skintone if you're only going to use it once a year!). Next step is to get a brown liquid eyeliner and start at your eyebrows then go right down to the end of your nose, and colour in your nostrils. Then taking a white kohl pencil or white eyeliner, carefully apply some white spots to the area on your lower forehead and cheeks going up to your ears. Apply this white kohl eyeliner pencil to your eye waterline and slightly flick outwards like as shown in the photo below. Apply some black liquid eyeliner on your upper eyelid and on the inner waterline just above where you have applied the white kohl eyeliner. Add a pair of false eyelashes to your upper eyelid if desired (this step is totally optional - I know how tricky false eyelashes are to apply). Add a headband with ears or tie up your hair into a bun and add some twigs to the bun as this lady has done.


2. Cat/Leopard
This is probably the most simple Halloween outfit known to man! It's the one I have actually got away with wearing two years in a row! Kudos to those who go all out with fake blood and stuff at Halloween, but myself I prefer to keep things quite wearable and easy while still looking cool. I had a leopard print playsuit in the wardrobe at the time and a cat ears headband (which subsequently ended up getting broken that night!), so after checking out some videos on YouTube I added some leopard print spots, dramatic eyeliner and false eyelashes, before adding some eyeliner for whiskers. You can add red lipstick for an added dramatic effect. For a cat the look is pretty much the same make sure you just wear all black instead of leopard print. Such an easy outfit! This is my makeup from last year:


Some variations of this for your inspiration...


3. Pop Art:
This is one of these make up looks that looks super difficult to do but it's actually not and it really looks impressive when done! I haven't actually tried this out on myself yet but really have to soon! Like the leopard/cat above, you really only need to focus on doing the makeup look because any black top and pants will do for the rest of the outfit. Apply your moisturiser/primer/foundation/powder/blusher as normal, and apply some false eyelashes if you wish, although that last step is completely optional. Obviously you'll need a white eyeliner pencil (you don't need to go super expensive with this, but the better the quality the more likely it is to show up on your face easier, especially if you're as pale as myself), and create medium-shaped dots all around your face and right down to your neck chest and arms. Start by working on the POW! on the collarbone then. It doesn't have to be a work of art by any means, but take your time with it. You can use pink and yellow eyeliner pencils to do this. Apply some red lipstick to your lips to fit in with the comic effect, and apply some white eyeliner pencil to the middle of your lips. Using a black liquid eyeliner, carefully apply it around your nose, on your jawline, around your lips, on your collarbones, at your boobs, around where you have written the POW!. Also draw a fake tear under one of your eyes, and colour it in with a blue eyeliner pencil. The second photo there is a variation on this look, you can use red eyeliner pencil/lipliner instead and change around the lines created with the eyeliner if you so wish.


4. Doll.
This is one of them makeup looks that look really difficult to recreate but it's actually not the case. Firstly, apply moisturiser/primer as normal and then some foundation in a pale shade (for most of us fair skinned maidens, that will be in your normal shade). Using some bright pink eyeshadow (you don't have to go super expensive with this either, a lot of budget make-up brands do this shade), apply this to your upper eyelid up to your browbone and  right down to bridge of your nose. Apply some white eyeliner pencil on your bottom eyelids as seen in the photo.  Apply some false eyelashes on the upper eyelids and some on the lower lashline. There are many theatrical styles avaliable for Halloween and these are in pretty much every discount outlet. You may wish to apply false eyelashes before doing the foundation - I do it that way, I find it easier and there's less chance of you messing up your base - but that is completely up to you. After applying the false eyelashes apply black liquid eyeliner to hide the eyeliner band on the upper eyelid and over the section of where the white eyeliner meets the false eyelashes on the lower lashline. Then go a bit crazy with some pink blusher on your cheeks, fill in your eyebrows so they look thick and defined, and apply your (obviously bright pink!) lippy to your lips in a heart shape.


Pic credit: divinecaroline.com


I hope you enjoyed this blogpost, and hope you all have a great Halloween, whatever you're doing for it!

As always do not hesitate to check out my social media links:


Snapchat: shellfoody92


Sunday, 6 September 2015

Beauty - Review of Boots Botanic Micellar 3-in-1 Cleansing Solution (All Bright)


Forgive me father, for I have sinned...

I'm cheating on my Garnier Micellar cleansing water with this Boots Botanic Micellar 3-in-1 Cleansing Solution (All Bright). I know I know, how could I do such a thing, especially after all we've been through... However, I promise it's not what you think!
I've mentioned in passing before that I'm moving to England in just over a week for university (eeep!) and as everyone knows you can't bring liquids on the plane (well not as much as this 250ml bottle). So instead of having things go to waste my sister gave me this Boots Botanic stuff to use up before we head off and since I've been using it the last week, I decided I may as well do a quick review on it.

Much like the Garnier micellar water (see review of that product HERE), this cleansing solution dissolves your makeup, unclogs pores and acts as a toner (hence the 3-in-1). This is alcohol and soap free, which is great for anyone that has sensitive skin like myself. This cleansing solution, along with the other products in the Boots Botanics range, is created by Boots scientists working with experts in plant science at Royal Botanic Gardens in the UK. I haven't tried out the rest of the products in the range, because when I find a skincare routine that works for me I tend to stick with it for years (for example I've been using the Simple Kind to Skin Light hydrating moisturiser for about five years), although I hear from other bloggers that the radiance balm is well worth picking up, so I may try that out sometime.

Anyways, back to this micellar cleansing solution. It differs from the Garnier Micellar Water in that it contains plant hibiscus which is "nature's brightening booster". Natural alpha hydroxyl acids (AHA's), from the flower act as mild exfoliators to help leave skin smoother and brighter. Don't get put off by the word alpha whateveritis, because they're naturally occurring in most plants and have actually been found to play a big role in anti-aging treatments (which is a story for another day). However, because this product contains this, it may increase your skin's sensitivity to the sun, so if you're going out in the sun (on the off chance that it may reappear in Ireland before the year is out), use a sunscreen while using this product and limit sun exposure during and even for a week after use of the product has stopped. This product claims to be "fragrance free", but when I first smelled it, I felt like there was a slight smell to it - it's definitely not as natural as the Garnier micellar water.

I applied some to my skin on a make-up pad after a day of wearing makeup. It got rid of my makeup quickly and easily, and while it stung slightly around the eye area, it quickly stopped. However, I was surprised by how my skin felt after. Usually after applying the Garnier micellar water to my face, my skin feels re-freshed so much so that I even feel like I don't have to apply any moisturiser to contouract any dryness. While my skin did feel refreshed and toned to a point, it did feel slightly tight in areas indicating dryness. For that reason, I felt like it wasn't as kind to my skin as the Garnier micellar water, and I just didn't really like the smell of it either, so for that reason, I wouldn't purchase this product for myself as part of my cleansing regime once I arrive in the UK. I did hear afterwards that there is a version of this product available for sensitive skin, so maybe I'll try out that.

It costs €3.49 in Boots.

As always make sure to follow me on social media!!

Facebook: https://www.facebook.com/kissandmakeupnow (send me a message and I'll like back your page).

Twitter: http://www.twitter.com/kissmakeupnow_ (I follow back)

Instagram: http://www.instagram.com/shellysaysso_ (I follow back bloggers)


Wednesday, 26 August 2015

Beauty - Kylie Jenner Inspired Makeup


I've done a blog post on Kendall Jenner makeup (see HERE) but it's her younger sister Kylie's makeup I'm focusing on today.


I'm sure we've all seen pictures of Kylie with this sort of makeup - matte light brown lipstick teamed with simple eyeshadow and some winged eyeliner, she wears it a lot in pictures and it's pretty much her go to look as you can see by the other pictures of her there. I really like it too as it's simple and easy to re-create, and is made up without looking too glam or overdone - my kind of makeup!

Kylie has revealed that the lip products she uses are Mac's Whirl lipliner and Velvet Teddy lipstick. As everyone knows, these are not only super expensive products - with the lipliner alone retailing at about €17 - but extremely hard to get your hands on (I've heard from numerous beauty bloggers that Velvet Teddy is almost always out of stock). However, I was in Penneys (Primark for you in the UK) and was looking through their own brand beauty section. I have used their lip products before and have their lipsticks and lipliner in a purple shade, but I was intrigued by their matte light brown lipstick and lipliner. Could these be dupes for Velvet Teddy and Whirl, I thought. They were both inexpensive at €1.50 for the lipliner and €2 for the lipstick so for that price I didn't have to think about it any longer - I knew I wanted to buy them and try them out!

Starting off I moisturised my face with my trusty Simple Kind To Skin Light Hydrating moisturiser (€5 - review of this product plus other skincare products I use is HERE) and applied some Nivea Essential Care lipbalm to my lips (€2.09 - review of this product plus other products I have been using that cost under 10 is HERE). I have used this Primark beauty lipstick before in different shade and I find that it's extremely matte and drying so your lips need to be well moisturised before application, though it being so matte it will last all day on your lips. As this look involves using eyeliner and I often mess it up, I worked on my eyes before my base.

I applied some Catrice Prime and Fine eyeshadow base (€3.20) to act as a primer. Taking the lightest, champagne shade on the left of the Catrice Absolute Nude eyeshadow palette (5.49 - review of that product is HERE). I sweeped that all over my eyelid and up to my browbone. Taking the colour beside that shade, I applied that in the crease and on the top of my eyelid, then blended it out with the lighter eyeshadow shade. I also applied some of the darker shade to my lower lashline. I carefully applied Essence Liquid Ink liquid eyeliner (€2.49) on the eyelid and flicked it out slightly at the outer corner. I then applied some New York Color Big Bold NYC Mascara (€3.20) to my upper and lower eyelashes.

The foundation I selected to use for this look was the Primark Beauty liquid foundation (a steal at only €3), as it's more matte than my usual Rimmel foundation. I applied only a tiny layer of this because I find with this foundation if you apply too much it can easily look like a cakey mess so do take care when applying it, however that said it is a really great foundation for the price you pay and is well up there with a lot of other expensive foundations I have tried out. I patted some Rimmel Wake Me Up concealer (€6.99 - see review of this product plus other Rimmel products HERE) under my eyes and on my blemishes using my fingers, and set the concealer with my Primark loose powder (€2.50). I then set the rest of my base with a very light dusting of Catrice All Matt Plus powder in '010 Transparent' (€3.49) before adding a tiny bit of glow with the Catrice Defining Blush in 'Sunrose Avenue' ( €4.75 - review of that product is HERE). Regarding eyebrows, I filled them in so they looked groomed using my Primark Beauty browkit (€2 - review of that product is HERE). I am planning on doing a blogpost soon on my eyebrow routine actually.

Onto the lips. I didn't  overline my lips. I think that just looks strange to be honest, but each to their own. Instead of applying lipliner inside of my natural lipline I applied the Primark lipliner on my lipline (if that makes any sense), then coloured my lips in with this shade. I think it looks far more wearable and anyways I really don't want to be walking around with huge inflated lips (my lips are big enough anyways!).  I then applied this matte lipstick.

Hope you enjoyed this look!


Don't forget to follow me on social media !!

Twitter: https://twitter.com/kissmakeupnow_ (I follow back all bloggers)

Facebook: https://www.facebook.com/kissandmakeupnow (message me and I'll like your page back)

Instagram: https://instagram.com/kissandmakeupnow/ (I follow back all bloggers)

Saturday, 8 August 2015

Beauty - Caring for Dry Skin

I've done a skincare blogpost before, and I mentioned in it that I have dry skin.


A huge cause of dry skin is the weather. In Ireland this year our summer has been more like winter, with plenty of rain (rain, rain and more rain), wind and cold temperatures, and this of course takes it's toll on your skin. Dry air will leave skin feeling extremely thirsty. Indoor heating and all this nice warming up against the fire (although super nice!), wrecks havoc on the skin further as it will strip more moisture from the air - and your skin. While we obviously can't unfortunately change this unseasonable weather, we can do something about how we react to it. If possible try to keep the thermostat at a cooler temperature.


Setting the shower to a hot temperature soothes your body after a long day of work, but it certainty won't do your skin any favours. It dries out the natural oils in your skin a lot quicker. Standing in the shower long enough for you to have deep thoughts about the universe/life/other important shizz or to belt out your favourite tune is also a no-go area. Dial down the temperature to lukewarm, and try to keep your showers as short as possible (not a bad thing thanks to these pesky water charges). Save the sing-along for the car or your bedroom! 


While you're in the shower too, it's worth noting that even though some shower gels and soaps smell super nice, some are more than a bit harsh on your skin and will send your skin's moisture straight down the drain. Use a mild, fragrance free shower gel on your skin (Simple do amazing ones) that will moisturise as it cleanses. That Simple shower gel will set you back a mere three euro.


Have you noticed that your favourite jumper might be to blame for your dry skin? Often it's the fabric, fabric softener or the washing powder you're washing your clothing in. Lots of everyday products can irritate the skin - from dryer sheets to perfume. "Free" is the key word to bear in mind when it comes to choosing products - fragrance-free and dye-free, or look out for ones specially formulated for sensitive skin, I know there's many washing powders that are available for baby's sensitive skin such as that Fairy's one there.


Dry skin may be an underlying cause of a health condition as well. If it's scaly and red, it could be a symptom of determitis or psoriasis. It could also be the symptom of diseases such as diabetes or an under active thyroid gland.
Disclaimer: I'm not saying it is, but if it refuses to go away, it might be worth getting checked out!

Here are a few of products I have tried out in the past that I find work well on my dry skin, some for face and some for body.


Face


So obviously it goes without saying that if you have any bit of dry skin at all, you need to have a good face moisturiser in your life, especially to act as a base when you're applying makeup. I've been using this Simple Kind to Skin Light Hydrating Moisturiser on my face before applying makeup for the last six years. I find that usually one layer is enough, but if my skin is especially dry I apply it in three thin layers. I have done a more in-depth review of this product on my skincare regime blogpost, please see HERE. It currently costs €5.29 in Boots. If you have sensitive skin I would highly recommend you to try out the Simple range, I cannot recommend it enough and most of the products are under ten euro as well, so it won't break the bank.


E45 Cream is something of a cult product when it comes to dry and sensitive skin. It's unperfumed and uncoloured. I personally find it a little too greasy so I wouldn't recommend it to use as a base before applying makeup for that reason. I prefer to use a light layer of it during the day after cleansing when my face is makeup free, if you apply a heavy layer it will cause pores to become clogged hence causing spots. Though if you use a light layer it does help your skin to be super smooth and supple. It costs €7.99 at the minute in Boots.


I tested out Garnier Moisture Match 24 Hour Ultra Hydrating Rich Cream which is specially formulated for Dry to Very Dry skin, mainly because my sister had bought it and at the time my skin was extremely dry. The packaging as you can see is quite girly and pink. It smells absolutely fabulous, quite flowery. It is absorbed very quickly into the skin and makes your skin super soft and smooth. As the name suggests, it is indeed very rich so like with the E45 cream I would really not advise to wear this as a base under your foundation or it will slide right off. Often products for dry skin are also formulated for sensitive skin as the two conditions often go hand in hand, but this is the exception, as it did sting my sensitive skin quite a bit. It costs €4 in Boots if you want to give it a try.


Body

Nivea have a good reputation for being leaders in skincare so it will come as no surprise when I say the two body moisturisers I use on a regular basis are by the brand.

Nivea Rich Nourishing Body Moisturiser: This comes in a navy plastic container as you can see. It contains Hydra IQ formulation which is a patented intense moisturisation technology specially formulated by Nivea which penetrates deep within the skin to foster new aquaporins (these are water channels in the skin that allow water molecules to travel in and out of skin cells), thus regulating the skin's moisture balance and reducing moisture loss. It also contains almond oil which has been used in skincare for centuries due to it's moisturising properties.
I'd use this product for a deep moisturisation if I spend a bit too long in the shower or if my legs feel dry after shaving them. I wouldn't be a fan of using this moisturiser after I shower and shave before applying tan. The proof is in the name that is guy is super rich and heavy and if you apply fake tan even three or four hours after it will rub off as it takes it's time to completely absorb. If you have no choice, shower and shave and apply this then apply tan the following day. The smell is fabulous though (like sun cream, which makes me weep for our lost summer!), and this smell lasts long after the moisturiser has been absorbed. It costs €3.54 in Boots.


Nivea Express Advanced Moisture Care Lotion
This is like the above product's sibling, same container design, only in white. It's designed for normal skin, but I use it on my dry skin as it's less rich so it's much faster absorbed into the skin, which means of course it can be applied once you come out of the shower to moisturise before applying tan for the night. Nice smell, it doesn't last quite as long as the above product's smell and is just more barely there.  It will set you back €3.66 in Boots right now.