Showing posts with label Affordable. Show all posts

Friday, 29 January 2016

Beauty - W7 In the Nude Review and Look

Hi everyone, and welcome back to my blog! :) Happy Friday!

So I was looking through my blog posts Wednesday night and realised it has been a while since I did a makeup tutorial for you guys. Most of my blog posts centre around what I wore but not really much emphasis on the makeup side of things. I really enjoy doing these tutorials, so I decided to do one for you yesterday early in the morning, as usually when I finish university it's dark. Gotta take advantage of that good lighting, yo!

Today's tutorial features a makeup palette I actually have with a while. It is by the British brand W7 and is called 'In the Nude'. If you're wondering whether it's something like you've seen before, you'd be right! W7 have a range of eyeshadow palettes all supposed to be affordable dupes (inexpensive versions) of Urban Decay Naked palettes. This guy is supposed to the dupe for the Naked 3, but they have ones for the Naked 1 and 2, as well as Naked Basics. I've never used any W7 products previous to this but I had heard good things about them.

As you can see below, the packaging is more or less the same and the eyeshadow shades look nearly identical, if not the same.


There is a huge difference in the price however. While the Urban Decay palettes would set you back at least €50 (around thirty pounds), I picked up this In The Nude palette in the summer back home in Ireland for €8.49 (about six pounds). They are widely avaliable here in the UK, somewhat more difficult to source in Ireland though they are avaliable to buy online on Amazon and Ebay. The quality of the W7 palette, contrary to what you may believe, is actually quite reasonable. No, they won't last all day without a primer, but hey, what eyeshadow will?

Before I begin with the tutorial, I'd just like to say that I am by no means a professional. I am currently studying to become an occupational therapist, not a makeup artist. I'm just a normal everyday girl who enjoys playing around with makeup and having fun with the whole process.


 Credit: anzellelew.blogspot.com.


Firstly, this is what I looked like with no makeup on. My skin is relatively good at the moment; I still am prone to redness and horrible dryness but for the most part, I'm happy with it!


1. First step in this tutorial was to prime my skin. My skin is really dry so I used Simple Kind to Skin Light hydrating moisturiser (£4.19/€5, review of that product is HERE). I recently re-bought this product and was a bit disappointed; it has changed the smell ever so slightly and it is slightly odd, really like suncream! Then I used Rimmel Fix and Perfect Primer (£6.99/€8.99, review of that product is HERE). Last week I popped on primer without moisturiser and it left a horrible stinging sensation on my face as my skin was so dry, so I'd really recommend using the moisturiser first. I then applied some Maybelliene Baby Lips (£2.99/€3.99), to my lips to moisturise them, but I use coconut oil a lot to moisturise them too.


2. When that was absorbed into my skin, I applied a thin layer of Rimmel match perfection foundation (£7.99/€9.99, review HERE). If your skin is in relatively good shape, there's no need to apply heaps of foundation, trust me! The brush I used to apply this was Primark's own brand foundation brush, I will be doing a review of these soon. I prefer to wait till all eye makeup is done before setting my makeup so I skipped powder for now.


3. Concealer next. I used two concealers. Rimmel Wake Me Up (£5.49/€6.99, review of that product is HERE) on any redness, and Collection Lasting Perfection (£3.99/€4.75), to highlight the areas under my eyes. Both applied with a Primark beauty concealer brush.

 3. Eyebrows was the next step. I filled in my eyebrows using my trusty Primark eyebrow kit (review of that is HERE). As you can tell by the packaging, I use it a lot! The brush I used was a double sided eyeshadow brush with a sponge tip, I just don't like these brushes in applying eyeshadow but they work for eyebrows!

4. Now for the star event: the eyeshadows. I applied latte, a nude, neutral colour just under my eyebrows to highlight them, using latte, the first shade on the left of the palette.

Next I applied copper pot, a deeper, vintage pink, all over my eyelid using a fluffy eyeshadow brush, these wooden ones were bought off Ebay. Using this same brush, I applied second colour from left, Angel, a sparkly pink, to my inner eyelid.

Then I applied Alice, a matte pink into my crease using one end of an eyeshadow brush from Primark. How much time and product you use here will really depend on how you defined you wish for your crease to be. I also applied some of Alice on my lower lashline.

I blended Alice out using Marilyn, a pink, yet slightly nude, using another one of my Ebay brushes. It's quite similar to Alice, only difference is it is slightly darker.

I applied Fashionista (a black eyeshadow with red sparkles, just shows up black though), about half way up into my crease, using my Real Techniques 'Detailer Brush' from their core collection set, slightly winging this out to form a shadow eyeliner.


Brushes used in the eye makeup (from left to right):
Slanted fluffy eyeshadow brush and fluffy eyeshadow brush, both from a set on Ebay.
Real Techniques 'Detailer Brush', as part of the 'Core Collection' set.
Double ended eyeshadow brush, Primark.


5. Now to add some extra drama at night time, if you wish you can add some false eyelashes. I decided to use the Revlon Intensifeye volumising eyelashes. I bought these in a multi-pack of four at where I work, Home Bargains, for £1.99. They didn't come with eyelash glue however so I had to use a Primark eyelash glue I found at the bottom of my makeup bag - desperate times cause for desperate measures! I applied these using my Revlon tweezers (bought in Superdrug a few months back, for about a fiver). Don't fear if you've no idea how to apply false eyelashes, I will be writing up a blogpost about application plus which eyelashes I have tried out. I then applied some Essence I <3 Extreme Crazy Volume Mascara (£2.80/€3.49, you can buy Essence in Wilko in the UK btw), to help blend my real eyelashes in with my falsies.


6. Now to finish off the rest of my face! I set my face using Rimmel Stay Matte powder (£3.99/€5.99) and then applied Primark loose powder (£1.50/€2) over areas where I'm prone to oily skin. Both were applied using my fluffy Primark blusher brush.


7. Blusher was next. Make Up Gallery  Blush in Soft Blush 1 (£1/€1.79, see review of this product HERE), again using a Primark makeup brush, but this was from a previous range.


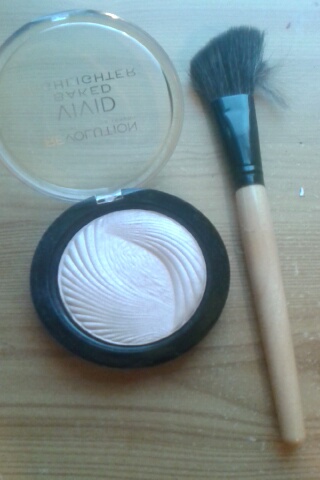
 8. Highlighter used was Makeup Revolution Vivid Baked Highlighter in 'Peach Lights' (£3), using an Ebay contour brush. I only bought this recently and I adore it! So pretty and sparkly, though you'd never think it with my crappy phone camera....


9. Last but not least, lips. I applied Catrice Lasting lipgloss (I think it's called that, the label has disappeared...). It's a pinkish nude which wouldn't distract from the strong eye make up look. I bought this back home in Ireland when I was back for Christmas for about five euro. Catrice is unfortunately not available in the UK (but it really needs to be!). It's available to buy on Ebay, but it's way more expensive on there (sob!).


And there you have it, the finished look! Hope you enjoyed this blogpost tutorial. Any questions, fire away!xxx

Wednesday, 27 January 2016

Coconut Oil: Benefits for Hair and Beauty

Hi everyone!

These days people are more aware of what products they are putting on their bodies. A lot of cosmetics have been linked to breast cancer among others, so many people are switching to organic, natural products. As a result, coconut oil has come to the fore front and has become the holy grail in this natural lifestyle, though it is not a new phenomenon at all, having been used in the US well before World War II.


There are literally hundreds apon hundreds of uses for coconut oil, to everything from cooking to adding in yoghurt and smoothies to putting on your dog! I personally prefer not to use it in food as I'm not sure would the taste be that great and also it is high in saturated fat, increasing your risk of heart disease, so this blogpost will just focus on its hair and beauty uses. As you might also expect, there are hundreds of hair and beauty uses too for this little gem! I'm obviously not going to talk about all of them as I don't want to bore you to death, and I didn't want to talk about things I haven't personally tried out myself.  I felt it wouldn't have been right to you guys, my readers, if I just paraphrased people's other work off the internet, saying it did this that and the other, you to try it out and it doing the opposite of what I was claiming it to do! My aim in writing this blog has and always will be about being really honest in what I did, so you'll know for sure about the product you're buying, the good and the bad bits. I got this big jar containing 500ml of coconut oil in my place of work, Home Bargains for £3.99 (about five euro), but I've seen it in Tesco and Holland and Barrett too.


Body Oil
My main reason for trying out this product was because of its moisturising properties I have heard so much about. I have mild to moderate eczema (a skin condition meaning my skin becomes itchy, red, dry and cracked, which fluctuates, hence why I have referred to it as mild to moderate, due to a number of factors, such as stress, detergents), plus sensitive skin, and contrary to what you might imagine, I have a difficult time finding moisturising products that suit! Many which tie the both together and soothe my skin are either ridiculously expensive or smell horrible! Simple is a good brand I have been using for years, but sometimes I want something that's slightly scented (being the girl I am).  Coconut oil is a natural product, inexpensive (see above) and smells like a beach holiday, meaning I'm always happy to slather it on everywhere after a shower or bath, and it doesn't irritate my eczema one bit! When I posted a photo of this on my Instagram HERE, I had a comment from one of my followers saying it helped calm down her psoriasis a lot, so if any of my readers have that, coconut oil is worth trying out!

Makeup Remover
Even the most waterproof mascara doesn't stand a chance against this guy! Apply some directly to your face to act as an oil cleanser or let it sit with a cotton pad, and voila! Your makeup will melt away. As it's a natural product, it suits even the most sensitive of skins. Garnier micellar water, you  have some stiff competition!

Lip Balm
In this winter weather, chapped lips are a common problem, which ain't great when you wear as many lipsticks as I do. I always used to use Vaseline as a lip balm, but I haven't used it in a while as I have read many articles claiming it to be linked to cancer. Coconut oil is a much more natural alternative, especially as it is semi-solid in room temperature. It makes lips super super soft - perfect coming up to Valentines' Day!

Under Eye cream
The skin under your eyes is delicate and thin, making it prone to fine lines, puffiness and wrinkles. Eye creams can be expensive (many retailing at £20 plus!), so save your pennies and invest in some coconut oil instead for a fraction of the cost. It's light enough for even the most delicate of under eye skin. Just rub a tiny amount between your fingers to warm it up before gently patting it underneath your eyes.

Frizz Tamer
I have naturally very curly hair so means whenever I try to straighten it in an attempt to look polished it ends up looking frizzy, ugh. The fact that my hair is dyed bleach blonde at the ends doesn't really do anything for the cause, to be fair! I've tried a lot of smoothing serums, from Tony and Guy to L'Oreál in the past, but this works just as well (and again, is a lot cheaper). Rub a pea-sized amount of coconut oil (any more and it will make your hair appear greasy), between your fingers to warm it up, then apply it to the bottom couple of inches of hair for all day frizz protection. If you're blessed with thicker, coarser hair, apply the oil in the same way but from mid-shaft to end for frizz control. The bonus with this is that it also leaves hair extra shiny and soft, plus smelling fabulous!

Shaving Cream
Whoever said shaving cream has to lather? Use this oil as a base to get a closer shave and a positive of this is that it results in smooth legs instead of legs that are dried out. Believe it or not, this actually works! It's less messy than using shaving foam, too. I didn't use it to shave my underarms as I feared it may be a little harsh on that sensitive area, but following shaving I did put a little under my arms to soothe it. I then lathered loads over my legs following shaving to lock in the moisture.

Dandruff Treatment
Dandruff and dry scalp often go hand in hand. Moisture is needed at the roots, which comes in the shape of this baby! Apply each night lightly to the roots, and massage in, which will also stimulate hair growth (bonus).
 

Leave in hair conditioner
Following shampooing, apply a tiny amount throughout your hair (breathe in that fabulous smell!). Then wrap your hair in a towel and allow it to dry naturally. I can really see the difference in my hair after using this. It smells better, feels better and created beautiful natural curls on myself. Love it!

Hand cream
Like many products mentioned, hand cream is another product that can be expensive. This multi-tasker helps here too! Apply some coconut oil to your hands and let it absorb (you can pop on some gloves to speed up the absorption process, but you don't have to). Result: silky soft hands. Yay!

Cuticles
I am in the process of growing my nails (so very determined to stop biting them for good now, but with placement just around the corner, we'll see how long that lasts!).  I had many torn cuticles caused by biting my nails and they were rather unsightly. I applied some coconut oil and it has greatly reduced their appearance. My nails look in better shape (well as good as a shape as can be expected!).

Some need to knows:

  • As it's an oil,  it does take it's time to dry, and so therefore can be slightly messy to work with. So wait a while before dressing yourself or covering a certain part of your body. When I applied it I wore shorts and a light vest top.
  • Coconut oil has a shelf life of 2 years, so don't worry about having to use it up really quickly. Just as well, I would struggle to use that big jar up in a short length of time!
  • You can store coconut oil in the fridge or at room temperature, the choice is completely up to you. It may be slightly more soothing on skin to have it slightly chilled; either way it melts in your hand straight away so it doesn't make too much of a difference.

Friday, 15 January 2016

Beauty - Make Up Gallery Review

Hi everyone, and welcome back to my blog!

I was in Poundland a few weeks ago and spotted that they had a range of make up there - Make Up Gallery. Everything was just a pound each (obviously!) so I decided to pick a few things out (sure it was hardly going to put me in debt!), and in the end I picked out four things: pressed powder, blusher, liquid foundation and colour moisture lipstick. For my Irish readers, these are avaliable in Dealz for €1.49 each.

Long Lasting Foundation
This is a liquid foundation that claims to be "natural long lasting". It contains UVA filters which is basically a thin film on the skin which protects it from sun damage (although it's unlikely it'll fufil it's role in the UK until another few months!) and also contains the antioxidant Vitamin E, which plays a role in anti-aging.
I picked up this foundation in the lightest shade - Ivory 1. I tried it out the morning before I headed to work after priming, and then added eyeliner, mascara, all the other bits. It seemed OK at first and I was quite happy. Then I went to the bathroom to get some tissue and caught a glimpse of myself in the mirror. As  my bathroom had much better light, the foundation appeared super orange. Like Oompa Loompa orange! I couldn't go anywhere obviously looking like that, so had to scrub it all off (including my liquid eyeliner - girls, if you know the struggle you will know how pissed off I was about that!), and applied a more paler fit-to-skintone foundation. Therefore, I've no idea of how this foundation is for wear!

Pressed Powder
As the powder in this range is Translucent, I had no concerns about trying it out. Again, this product contains Vitamin E. It does have a rather strongly perfumed scent to it. Personally I didn't mind it but I know many others will. I was really impressed with this powder, though. I applied it all over, and it helped my makeup stay matte and oil-free all day long, working as well if not better than other high end brands I've tried in the past. Really good buy!


Blusher
This light pink blusher - 'Soft Blush 1' is in a teeny tiny container and like the other products, also contains Vitamin E. It doesn't have a strong scent like the powder. It's not very pigmented, but it does give a very subtle, in-from-the-cold effect, and lasts well.  Another good 'un!


Colour Moisture Lipstick
The lighting in Poundland at the time must have been off  - or else I'm going blind - but when I picked up this lipstick I thought it was black and was slightly excited as I have been meaning to try out a black lippy for quite some time. With a name like 'Black Cherry' you wouldn't blame me for thinking that! However, when I tried it out for a night out over Christmas, I found out that it's really more like a dark berry. I wanted to try it out for the night but I quickly found it doesn't have a great pigment at all - the first coat looks purple, the next application looked just slightly more pigmented. And as it was New Year's Eve, I really didn't want to be stuck in the bathroom re-applying it after every drink, so decided to stick with my Rimmel Lasting Finish lippy.


Friday, 25 December 2015

Fashion and Beauty - Christmas Day!

So after the visit to Mass, the unwrapping of presents from Santy, and falling into a food coma after the dinner, I took some time out and decided to write up a blogpost about what I was wearing today for the special occasion. I like to lay round in my trackie and hoodie as much as any other girl, but Christmas only comes round once a year so I like to make some effort for the day.


The tunic dress I'm wearing is from Penneys (Primark) and cost €14 (£10.33). I bought it Sunday afternoon after arriving in Ireland for Christmas. I really like the berry shade of it; this colour is always associated with the festive season so I felt like it was perfect! It actually has sheer sleeves, but to keep nice and toasty during the winter day I popped a long sleeved black top underneath it.
These long sleeved black tops are basic, and they're an essential part of my winter wardrobe, and only cheap as chips too, so I'd definitely recommend to invest.

The black tights were basic ones from Penneys, also bought on Sunday. I got three pairs for €6.

The scarf was also Penneys, it belongs to my sister though so I don't know the price, sorry! I'd imagine it would cost no more than a tenner. Many of my scarves are summery and light, and this is a nice thick one, so perfect for winter.

The boots are Shoe Zone, they have a slight heel on them. I bought them the first weekend I arrived in England as a birthday present to myself (I'm awful good to myself!). They were £20.

The coat is Penneys, but I bought it two years ago so I cannot for the life of me remember the price of it! I really like it as it comes out slightly at the hips and is super warm too!

Before applying makeup, I moisturised my face and neck using my trusty Simple Kind to Skin Light Hydrating Moisturiser and waited a few moments for it to absorb. My skin is super duper dry at the moment, so I applied it in a thin layer three times. FYI, I've done a blogpost on caring for dry skin, which you can check out HERE.

Foundation I used was L'Oréal True Match foundation in Ivory (the lightest shade in the range). I decided to try out this foundation about two weeks ago as I have heard it being hailed as the 'holy grail' of foundations. I'm not going to say too much  about it here as I am planning on doing a seperate blogpost all about it in the coming weeks. The concealer I used was Rimmel Wake Me Up (review of that product is HERE) under my eyes and on blemishes, before setting it with Rimmel Stay Matte translucent powder.

For eyes, I decided to use a combination of gold and brown eyeshadows to complement the berry in my dress. I used the eyeshadows in the Make Up Revolution Flawless palette. I bought this palette, containing 32 eyeshadows, in Superdrug last month. Correct me if I'm wrong, but sadly, I don't think Make Up Revolution is avaliable in Ireland. I applied 'Medal' all over my lid and up to my browbone. I then applied 'Copper Shimmer' in the crease. Then I applied a small amount of 'Molton Chocolate' where my eyeliner 'flick' would go from. Then I applied 'Gold Digger' at the inner eye. I then used Essence Liquid Ink Liquid eyeliner on the inner eyelid and flicked out to create winged eyeliner effect. I applied a tiny amount of Rimmel Soft Kohl Kajal Pencil on my waterline, going about half way across. I find that on my small hooded eyes, black kohl eyeliner makes them appear even smaller, so it's used sparingly with me!


The blusher I used was Make Up Gallery Blusher in 'Soft Blush 1'. Make Up Gallery is actually a range of makeup from Poundland, would you believe! In Ireland this range is avaliable in Dealz. I've been trying out this guy plus a few other products for the past few weeks so that is another post I am looking forward to showing you all. I filled in my eyebrows using Primark eyebrow kit.

I was trying to find a lipstick to suit my eye makeup and dress, and I felt red didn't match either of them, so I stole my mum's Essence lipstick in the shade '04 On the Catwalk'. Mum loves this lipstick and after wearing it for the whole day today, I can see why! I've never used any of Essence lipsticks before but I may have to invest after today! This and the liquid eyeliner I mentioned above are widely avaliable in Ireland, from Penneys to several pharmacies, but the only place where Essence is avaliable in the UK is Wilko.


                                                             Product List and Prices:

Simple Kind to Skin Light Hydrating Moisturiser, €5/£3.70.
L'Oréal True Match Foundation in 'Ivory', £9.99/€13.55.
Rimmel Wake Me Up Concealer in '040 Soft Beige', £5.49/€6.99.
Rimmel Stay Matte Powder in '001 Transparent', £3.99/€5.99.
Make Up Gallery Feeling Blush Blusher in 'Soft Blush 1', £1/€1.49.
Make Up Revolution Ultra Eyeshadow Palette in 'Flawless', £8.
Rimmel Soft Kohl Kajal Eye Liner Pencil in '061 Jet Black', £2.99.
Essence Liquid Ink Liquid Eyeliner in 'Black', €2.49.
Essence Lipstick in '04 On The Catwalk' (think its around €3/£2).
Primark Eyebrow Kit, £1/€2.


Hope you enjoyed this post! Any questions, don't be shy! xx

Wednesday, 11 November 2015

Fashion - Primark Haul!

Hi everyone! :) If you follow any of my social media sites, you'll know that on Monday night my little blog reached a major milestone and finally made it to a whopping 10,000 views. Wow, that's crazy! Needless to say, I'm very grateful for the support, and when I started blogging only eight months ago in March I thought no-one would be interested in it, so thank you so much for taking the time out to read and support my blog. Here's to the next 10,000 views! In celebration, I started tweaking some elements of the blog last week to make it a bit easier for you guys to find me on my social media sites, as I only publish a  blogpost every few days but I post on Twitter and Instagram quite a bit! You can access these at the right of the post.

Anyways, my blog today features my Primark haul from a few weeks ago. Apart from the few things I brought over to uni with me from Ireland in September, and a few bits here and there, I haven't really bought many clothes for myself recently. There's no Primark where I'm living in Cumbria and although there's a New Look, it's more than a bit on the expensive side; grand for a few emergency pieces of clothes like interview wear, but you wouldn't exactly get much change back from £50 to shop in there. In short, I've been looking like a hobo around university; I don't think anyone there that's seen me the last few weeks would guess I'm a fashion blogger! So I took a very necessary trip down to Preston a few weeks back and took full advantage of the Primark there.

Preston is a city in Lancashire and is about an hour and a half away from Carlisle. It's an average sized place really; slightly bigger and busier than Carlisle but less busier than let's say, Manchester or Liverpool by far. The Primark there is big enough, not as big as the Primark (Penneys) that's in my home town in Ireland but a decent size. After over a month of not being in a Primark, I got a little distracted at first and quickly forgot about my shopping list I had scribbled down in my diary prior to the visit (always the way!). But I did manage to get a good few bits of clothes for myself. I'm not going to include the prices, but I did give my debit card a good battering as they say in there. I'm not one to spend a lot of money in one go, but I won't be in a Primark until I come to Ireland at Christmas time and I did spend my earned wages on the clothes, so I like to think of it as treating myself.

Anyways, I guess you want to see what I bought...

First thing up is a bright yellow neon hoodie. I had a complete lack of hoodies in my wardrobe, and needed something to just throw on if I'm late for uni (or can't be bothered to make an effort!) and this fits the bill. I really liked the bright yellow colour too, it's so eye-catching and may even be as good as coffee to help to wake me up in the mornings!


Item two is a pair of dark blue skinny jeans. I brought some of my jeans over with me, but I think I've ranted before about Primark's skinny jeans; they have stretched in the wash and aren't so skinny anymore. I hate it when skinny jeans become slightly baggy; they just lose all appeal in my eyes. So I needed a new pair that I can team with a jumper or a top.


Item three and four are just plain white T-shirt vests. I must have brought at least five of these over from Ireland and bought another three in New Look when I came over, but I had a bit of a misfortune with the washing machine a few weeks back in which I stupidly put all my clothes into the wash together and mixed these with dark blue jeans. Obviously, they came out light blue and were pretty much ruined (silly me, better not do that with my white placement uniform!). These are really handy wear under a shirt or a jumper on these chilly mornings.


Item five is a pair of purple tracksuit pants. Again, like the hoodie, these are just basics that are easy to throw on if I'm lazing around the house or if I can't be arsed to get done up for uni in the mornings.


Item six is a 2-in-1 shirt and grey jumper top.  I must confess; I've had my eye on this one for a while! I fell in love with it when I was still back home in Ireland but hadn't the spare monies back then to buy it - devestated! I think it's super super cute and can't wait to wear it with jeans, boots and a leather jacket.


Item seven is a brown faux-suede skirt. I really have a lack of skirts in my wardrobe and thought this one looked super cute. I'm looking forward to teaming this with a pair of tights, a cute top and black boots in the coming weeks.


Item eight is a tartan scarf. I brought some scarves over with me from Ireland, but they were really thin ones, which won't keep out the chill these days! I really think this one is so cute and it's so soft too!


Item nine is a boho-inspired playsuit that was actually reduced to just five pounds so I had to! No, I really had to! Even though it's obviously a summer outfit (hence the reduction), I really think it will work well for the cooler months teamed with a pair of thick tights, boots, a scarf and a warm jacket.


Item ten is just a basic T-shirt - black and white stripes. Good for wearing under a jumper or a hoodie or just lazing around the house.

Item eleven is this really cute monochrome top I just fell in absolute love with (who needs a boyfriend when you have clothes this cute?!). Black and white is a colour combination that is so effortlessly classic and I thought the bow tie neck detail was just too adorable to not have.


Item twelve is a wooly forest green (looks black in my idiotic phone camera's photo!) polo-neck jumper that is just so snuggly and cosy. Perfect for chilly days!


Item thirteen is this white jumper with navy stripes, which is a nod to the nautical trend. I thought it was super cute and had immediate visions of paring it with red lippy (as if I needed an excuse to wear red lippy!).

Item fourteen is a black and white striped skirt that goes to my knee. If you couldn't tell already, I love wearing black and white and this striped skirt also gives a nod to the nautical trend (more red lippy!).

 
Item fifteen is a checked shirt. I have some shirts in my wardrobe already, but as they were bought during the 'warmer' months (in Ireland that means when the rain gets warmer, we don't get much sun, poor us!), they're not really appropiate for wearing now unless you have five vests and T-shirts on underneath! This one is slightly thicker so warmer for the changing season. I love wearing checked shirts, I think they're easy to just throw on with a leather jacket and look sooo effortless!


Item sixteen is a pair of patterned trousers. This is another item I've just wanted to buy for so long. I constantly see these trousers online and really wanted to invest! Surprise surprise, it's also black and white! I can't wait to wear these on a night out with a cute top, high heels and my trusty leather jacket!

Item seventeen is a pair of eyelashes by Primark beauty. I've used many of their eyelashes before, but I haven't seen these 'Intense' style in any store in Ireland I've ever visited so had to invest! I'll have to try them out soon and let you know my thoughts...


The last few items are some makeup brushes. Just before I left for England, Primark brought out their make up brushes and I didn't feel like buying more at the time, but I've heard these ones are all right so decided to give them a go for myself! I picked up the blusher brush, the liquid foundation brush, the concealer brush and the eyeshadow/concealer brush. I hope to do a seperate blog post on these guys once I use them over the next few weeks and let you know what I think!


Hope you enjoyed my Primark haul! Happy shopping!! xx

Sunday, 23 August 2015

Beauty - Sally Hansen Nail Growth Miracle Treatment: Part 1


As a beauty blogger, I'm constantly in Boots or a chemist searching for new make-up to try out, and of course because all these make-up brands have nail polishes, I end up looking at them too and feeling disappointed that I can't try out these really nice nail polish shades on my own nails.

I bite my nails. So so bad. I have done so since I was about ten years old. It began mostly out of habit and gets significantly worse around the time of stress, i.e. exams (final year college exams I literally had no nails whatsoever).

I decided enough was enough. I'm 23 in a few weeks, plus going to be starting my second degree soon, and I just felt that the nail biting was something a bit childish and implies an unprofessional attitude.

With that in mind, I was in Boots the other day and decided to get something that might help my nails to grow a bit stronger. I picked up Sally Hansen Nail Growth Miracle for €10.50.

This is marketed as a salon strength treatment that promises to give 30% longer nails in just five days. To quote what's on the back of the pack:  "Exclusive soy protein formula helps strengthen and lengthen nails without brittleness. Keratin formula protects nails against splitting, cracking and tearing. Collagen and multi-itamins formula promotes healthy nail growth."

The packaging is quite basic - all plastic with a gold cap. The brush is big to allow for easy application. The liquid is clear and you apply it to your bare nails much like you would do with a regular nail polish. It does have quite a strong smell so when you apply it sit beside an opened window so you won't die from the fumes!

This blogpost is basically a part one of how I got on with it after five days and what was my initial thoughts on it. I'll have another blogpost in a month when I've tried it out that long.

After using it for five days, applying it to my nails once a day and not biting my nails for over a week (bit of an achievement for me!), they appear to have become stronger. I'm not just saying this, but I definitely did feel like they had got longer. I can scratch things now, yay! Haha. After five days that is pretty phenomenal.

I've added some before and after application photos below, you can decide for yourself whether it's helping to grow my nails. Bear in mind though that this is only after five days of usage!

I do apologise if I gross anyone out with before and after pictures of my nails.

Before


After